How Bright Should LED Strip Lights Be? Lumens per Meter by Room
For most LED strip projects, brightness is easiest to compare by lumens per meter: around 200–400 lm/m for accent lighting, 400–700 lm/m for ambient rooms and hallways, and 700–1,200 lm/m for under-cabinet lighting, desk lighting, or task lighting.
The right level depends on where the strip goes, how far the light travels, whether the strip is hidden or visible, and whether you need soft mood lighting or usable work light. This guide helps you compare LED strip brightness levels, avoid strips that look too dim or too harsh, and choose a setup that fits the room before you buy. If you are new to this category, our complete beginner’s guide to LED strip lights is a helpful place to start.
Quick Answer
As a quick rule of thumb, choose LED strip brightness by use: 200–400 lumens per meter for accent lighting, 400–700 lm/m for ambient rooms and hallways, and 700–1,200 lm/m for under-cabinet, desk, vanity, or task lighting.
- 200–400 lumens per meter is best for shelves, TV backlighting, bed frames, and decorative accents.
- 400–700 lumens per meter works well for hallways, coves, indirect ceiling lighting, and general ambient glow.
- 700–1,200 lumens per meter is usually better for kitchens, desks, vanities, and task lighting.
- 1,200+ lumens per meter may be useful for workshops, retail displays, or high-output linear lighting.
- Chip density, voltage, diffuser choice, color temperature, and mounting distance all affect perceived brightness.
- Dimmable strips are the safest choice when you are unsure how much light you need.
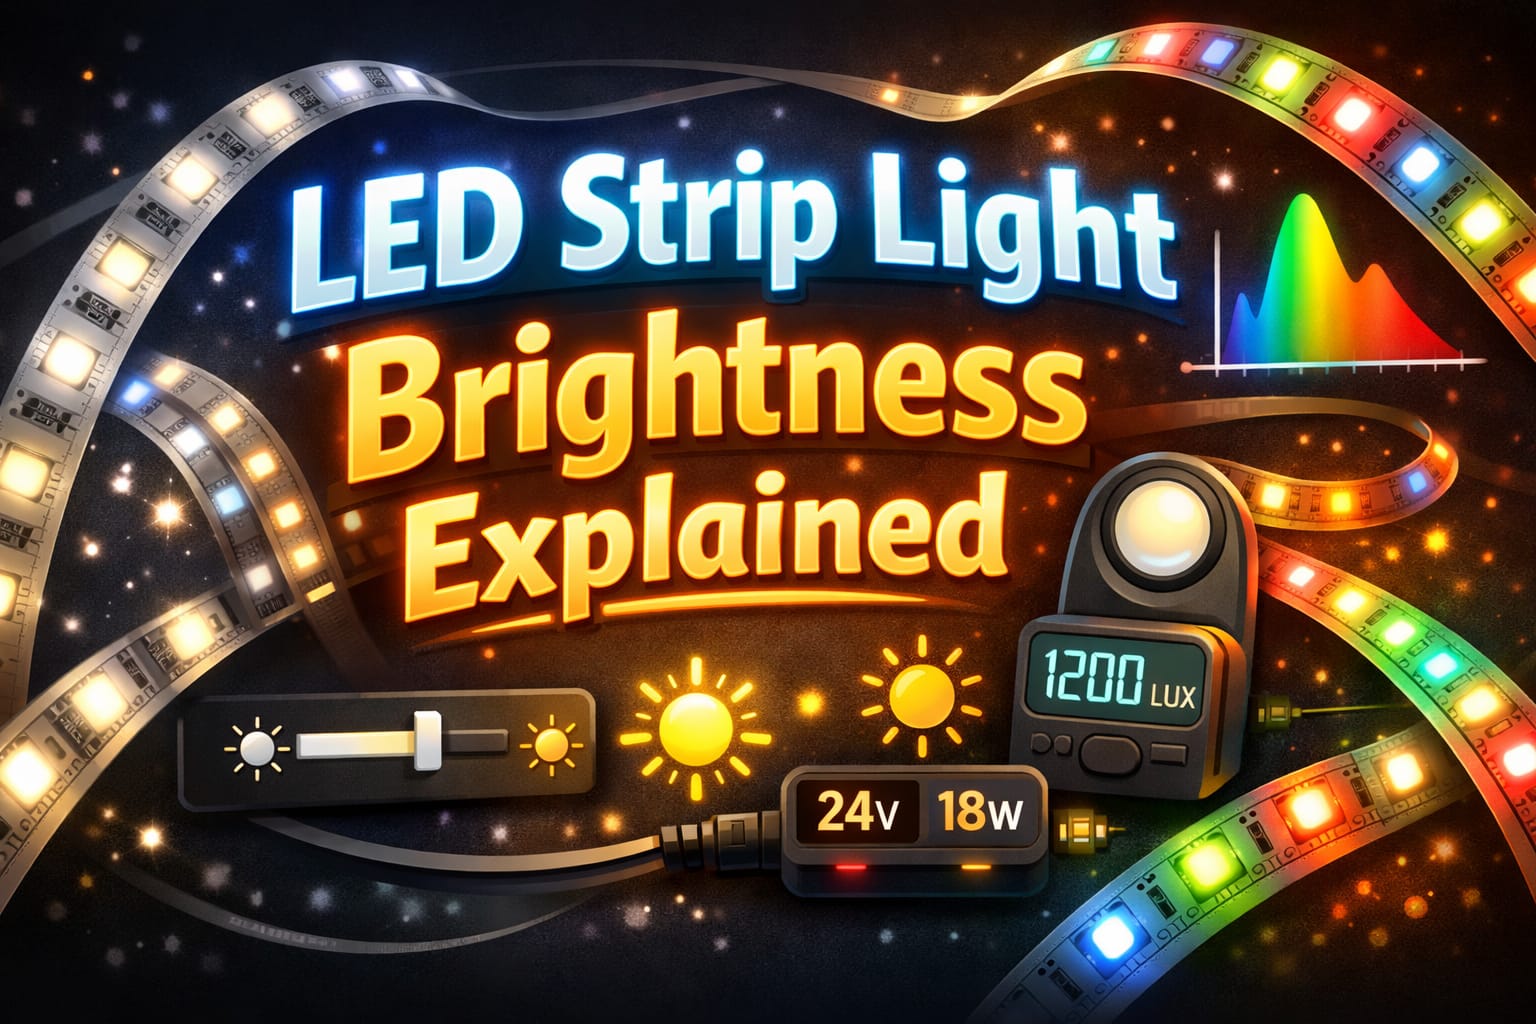
Table of Contents:
LED Strip Brightness Chart by Room and Use
The best lumens-per-meter range for an LED strip depends on the purpose of the light. A hallway does not need the same brightness as a kitchen counter, and a decorative shelf does not need the same output as a workbench. Use these ranges as practical starting points, then adjust based on room size, wall color, mounting distance, and whether the strip will be dimmable.
- Accent lighting: 200–400 lm/m for shelves, TV backlighting, bed frames, display niches, and decorative edges.
- Ambient rooms and hallways: 400–700 lm/m for soft general glow, indirect ceiling lighting, coves, and corridor lighting.
- Under-cabinet and task lighting: 700–1,200 lm/m for kitchens, desks, vanities, laundry areas, and reading or work surfaces.
- Workshops and commercial areas: 1,200–2,000+ lm/m when stronger output is needed for visibility, display lighting, or practical work.
For hallways, the safest starting point is usually 400–700 lumens per meter. This gives enough light to guide movement without making the space feel harsh, especially when the strip is hidden in a cove, behind trim, or pointed toward a wall instead of directly into your eyes.
For kitchens and desks, focus less on how bright the strip looks and more on how much usable light reaches the surface. A strip rated around 700–1,200 lumens per meter is often a better fit because it helps reduce shadows and makes the light more practical for cooking, reading, or detailed work.
For shelves, bedrooms, TV units, or decorative effects, lower output usually looks more premium. Around 200–400 lumens per meter is often enough to create depth and contrast without overpowering the room.
How to Compare LED Strip Lumens per Meter
When comparing LED strips, the most useful number is lumens per meter. It tells you how much visible light a one-meter section produces, which makes it much easier to compare different strips fairly. Unlike watts, which measure energy use, lumens describe light output. For a clearer breakdown, see our guide on lumens vs. watts.
Always check whether a product listing gives lumens per meter, lumens per foot, or total lumens for the whole roll. A five-meter roll with 2,500 total lumens equals 500 lumens per meter, which is very different from a strip rated at 2,500 lumens per meter.
Another useful measurement is lux, which describes how much light reaches a specific surface. Lumens tell you what the strip emits, while lux tells you how bright the counter, wall, floor, or desk actually appears after distance, beam spread, mounting angle, and diffusion are taken into account.
If you are choosing between two brightness levels, pick the dimmable setup. Pairing the strip with a dimmable LED controller for adjusting brightness lets you reduce glare, soften ambient lighting, or increase output when you need more visibility.
Color temperature also changes how bright a strip feels. Cool white strips in the 5000K–6500K range often appear brighter and sharper than warm white strips in the 2700K–3000K range, even when the lumen rating is similar. Warm light is usually more comfortable in bedrooms and living rooms, while neutral or cool white can feel more effective for kitchens, desks, and work areas.
What Affects Real-World Brightness
Two LED strips with similar lumen ratings can look different once installed. Real-world brightness depends on chip density, LED quality, voltage stability, heat control, diffuser choice, mounting position, and the color and texture of nearby surfaces.
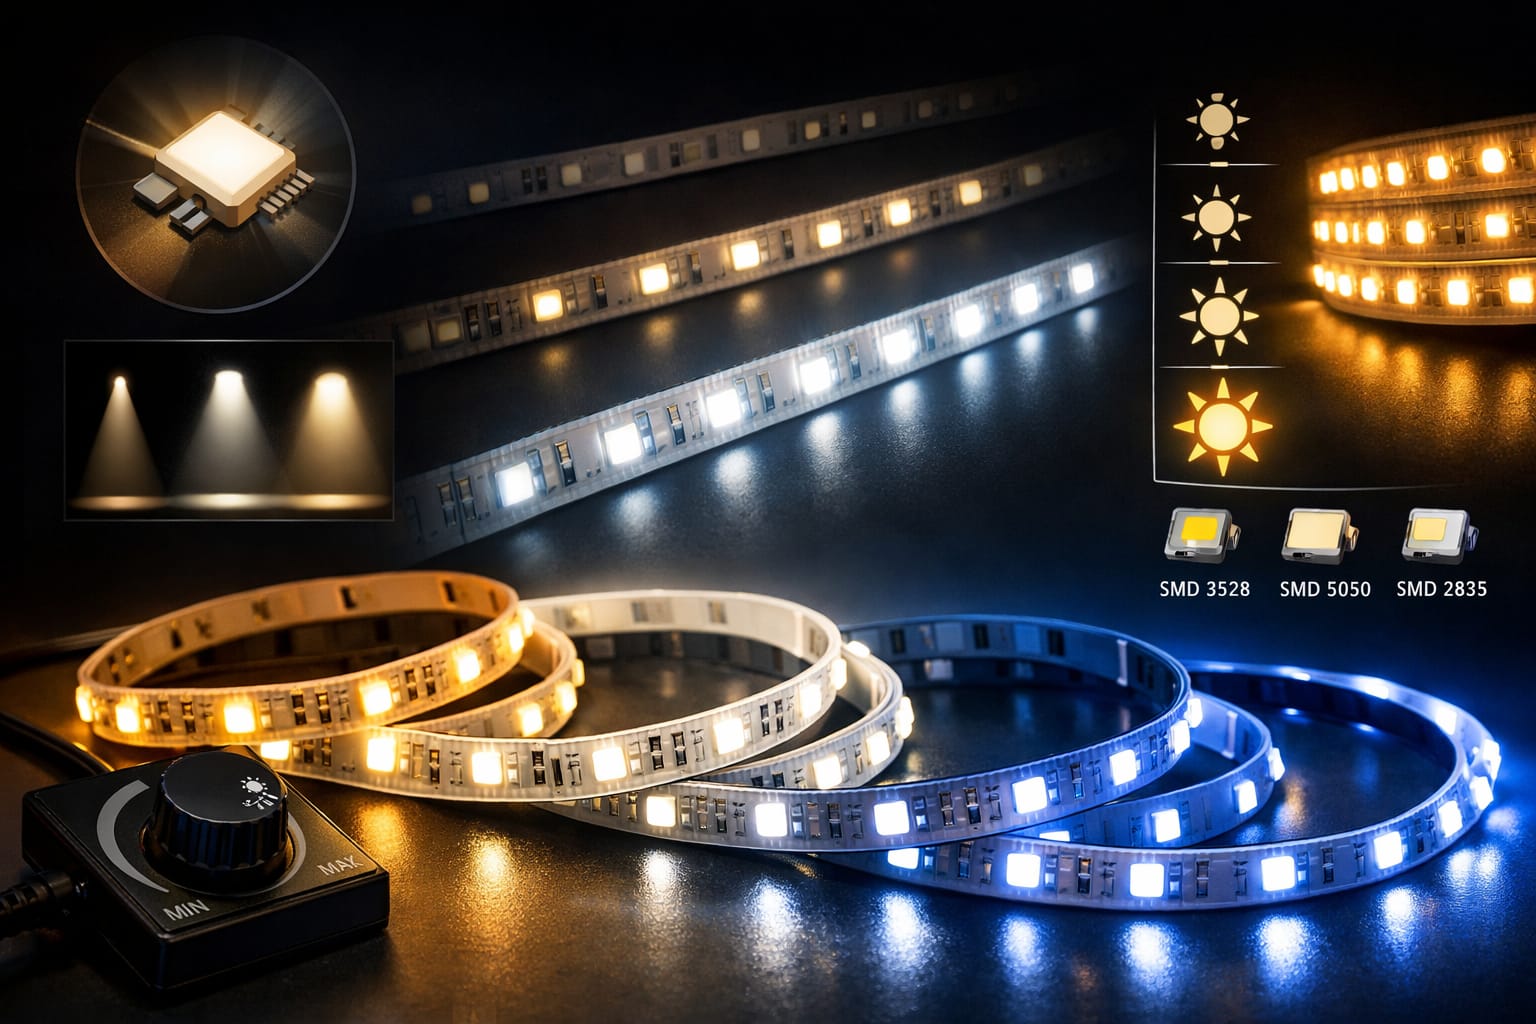
Chip density affects both brightness and smoothness. Common options include 30, 60, 120, and 240 LEDs per meter. A lower-density strip can work well for hidden accent lighting, but a higher-density strip usually creates a smoother line of light with fewer visible dots, especially when the strip is close to a wall, diffuser, cabinet, or work surface.
For soft ambient lighting, 60 LEDs per meter may be enough. For kitchens, desks, vanities, and workbenches, 120 LEDs per meter or more often looks better because the light feels more even and useful. If you want stronger output with fewer visible hotspots, consider a high-density LED strip for smoother task lighting.
LED quality matters too. Better LEDs usually deliver more lumens per watt, keep their brightness more consistently, and hold color better over time. Cheaper strips may look impressive on paper but run hotter, fade faster, or show uneven brightness across longer runs.
Voltage choice becomes more important as the strip gets longer. Lower-quality strips and poorly planned power setups can become visibly dim at the far end. If you are comparing 5V, 12V, and 24V options, our LED strip voltage guide explains how voltage affects consistency, distance, and power planning.
Diffusers and aluminum channels can slightly reduce peak brightness, but they often improve the final look. A diffuser hides individual LEDs, softens glare, and makes the strip feel more professional. If a clean, dot-free line is more important than raw output, COB LED strips are often a better fit because they produce a more continuous glow.
Common Brightness Mistakes to Avoid
Most brightness problems come from choosing a strip based only on the biggest number in the product listing. A high lumen rating can still disappoint if the strip is the wrong density, the voltage is poorly planned, the diffuser blocks too much light, or the power supply is undersized.
Choosing too much output can make a room feel harsh. In many homes, 300–800 lumens per meter is enough for everyday ambient lighting, depending on placement and surface reflection. It is usually easier to dim a bright strip than to fix a dim one, but choosing a balanced output from the beginning gives a more comfortable result.
Ignoring voltage drop is another common issue. Long runs can lose brightness toward the far end if the system is not designed properly. In many cases, 12V strips should stay around five meters per run, while 24V strips can often go farther before voltage drop becomes obvious. The exact limit depends on strip design, wattage, wire thickness, and power injection.
A strip with a high lumen rating can still look dim if power delivery is poor. For hallways, ceiling coves, or longer continuous runs, a 24V LED strip for longer runs with less voltage drop is usually a safer choice than a comparable 12V strip.
Using the wrong color temperature can also make a strip feel wrong for the room. Cool white may look brighter and more practical, but it can feel too sharp in a bedroom or relaxing space. Warm white may feel softer and more premium, but it may need a slightly higher output for the same visual impact.
Forgetting moisture protection can shorten the life of the installation. If the strip will be used in a bathroom, kitchen splash area, patio, or outdoor location, check the protection level before buying. Our guide to IP ratings for LED strips explains what to look for.
Installation Tips for Better Brightness and Uniformity
Even a good LED strip can underperform if installed poorly. Surface preparation, power supply sizing, heat management, diffusion, and mounting distance all affect how bright and even the finished light looks.
Prepare the surface properly. Clean, dry, and smooth surfaces help the adhesive hold and reduce the chance of lifting, sagging, or uneven contact. Poor mounting can trap heat and make the strip less reliable over time.
Use the right power supply. Calculate the strip’s full wattage before buying a driver. For example, a five-meter strip running at eight watts per meter needs about 40 watts, so the power supply should have extra headroom rather than operating at its limit.
Control heat where possible. Heat can reduce brightness and shorten component life. Aluminum channels help dissipate heat, protect the strip, and create a cleaner final look, especially in cabinets, coves, and longer installations.
Use diffusion when the strip is visible. A diffuser softens the light, hides individual LEDs, and reduces harsh hotspots. Although it may slightly reduce peak output, the result often looks brighter and more comfortable because the light is smoother.
According to the U.S. Department of Energy, high-quality LED products can maintain useful light output for tens of thousands of hours. In practice, good heat control, stable power, and quality components all help the strip maintain brightness for longer.
What Should You Choose?
The best choice is not always the brightest strip. It is the strip that gives enough usable light for the job without creating glare, visible dots, overheating, or uneven output. Use the decision points below to choose a practical brightness level.
- For a hallway: choose 400–700 lm/m, warm or neutral white, and consider 24V if the run is long.
- For a kitchen counter: choose 700–1,200 lm/m, neutral white, good chip density, and a properly sized power supply.
- For shelves or TV backlighting: choose 200–400 lm/m and focus on smooth diffusion rather than maximum output.
- For a desk or workbench: choose 700–1,200 lm/m or more if you need strong task lighting across a larger surface.
- For a bedroom or relaxing space: choose a lower-output strip or use dimming so the light can stay soft at night.
- For long ceiling coves: choose a higher-voltage setup and plan power delivery carefully to avoid brightness drop.
If your project needs unusually strong light, such as workshop lighting, retail display lighting, or a bright architectural line, you may need a strip above the normal home range. For those cases, our high-brightness LED strip usage guide goes deeper into stronger output, installation planning, and power requirements.
FAQ
How Many Lumens per Meter Do I Need for Hallway LED Strip Lights?
For most hallways, 400–700 lumens per meter is a good starting range. Use the lower end for soft indirect lighting and the higher end if the hallway is long, dark, narrow, or needs to function as practical walkway lighting.
Are Brighter LED Strips Always Better?
No. A brighter strip can create glare, harsh reflections, or an uncomfortable room if the output is too high for the space. The best choice is usually the right brightness for the application, preferably with dimming so you can fine-tune the result.
Is LED Density the Same as Brightness?
No. Density means how many LEDs are placed along the strip, while brightness is usually measured in lumens per meter. Higher density often makes the light smoother and more even, but the actual brightness still depends on LED quality, wattage, efficiency, and power design.
Do Smart LED Strip Lights Need Different Brightness Levels?
Smart LED strip lights use the same brightness principles, but dimming, scenes, schedules, and app control make them easier to adapt. For hallways, ambient rooms, and multipurpose spaces, a dimmable smart setup is useful because you can use brighter settings during the day and softer settings at night.
Why Does My LED Strip Get Dimmer at the End?
The most common reason is voltage drop. Long runs, thin wires, undersized power supplies, or high-wattage strips can cause the far end to receive less power. Using the right voltage, shorter runs, thicker wire, or power injection can help keep brightness more even.
Key Takeaways
The brightness of an LED strip light is best compared by lumens per meter. As a practical guide, use 200–400 lm/m for accent lighting, 400–700 lm/m for ambient rooms and hallways, and 700–1,200 lm/m for under-cabinet, desk, and task lighting.
The final result also depends on chip density, voltage, color temperature, mounting distance, diffusion, surface reflection, and power delivery. A strip with a high lumen rating can still look poor if the setup is badly planned.
The safest choice for most homes is a balanced, dimmable strip that fits the room rather than the brightest strip available. Match the output to the purpose, plan the voltage and power supply correctly, and use diffusion when you want a smoother, more professional look.
Sharing This Guide
If you found this guide helpful, save it for later or share it with someone planning an LED strip project. It is especially useful for beginners, homeowners, and DIY users who are comparing brightness levels for the first time.
Share using the links below.
Interested in learning more? Browse all related articles in our category section.