How to Cut LED Strip Lights Without Damaging Them
Learning how to cut LED strip lights correctly is one of the most important steps in any custom lighting project. Whether you’re adding under-cabinet lighting, trimming a strip for shelving, or creating a simple accent setup, a clean cut in the right place helps the strip keep working properly and makes the installation look more professional.
Most LED strips can be cut, but only at specific printed marks. If you are completely new to this type of lighting, our beginner’s guide explains the basics before you start measuring, trimming, and reconnecting sections.
Quick Answer
To cut LED strip lights safely, measure the length you need, find the printed cut mark, and make one straight cut across the strip with sharp scissors or flush cutters. Never cut between marks, test the strip before mounting it, and reseal the end if you are working with waterproof strips.
- Cut only at the printed scissor icon or marked line.
- Use sharp tools to protect the copper pads.
- Do not remove the adhesive backing until after testing.
- Check polarity if you plan to reconnect sections.
- Reseal waterproof strips before using them in damp areas.
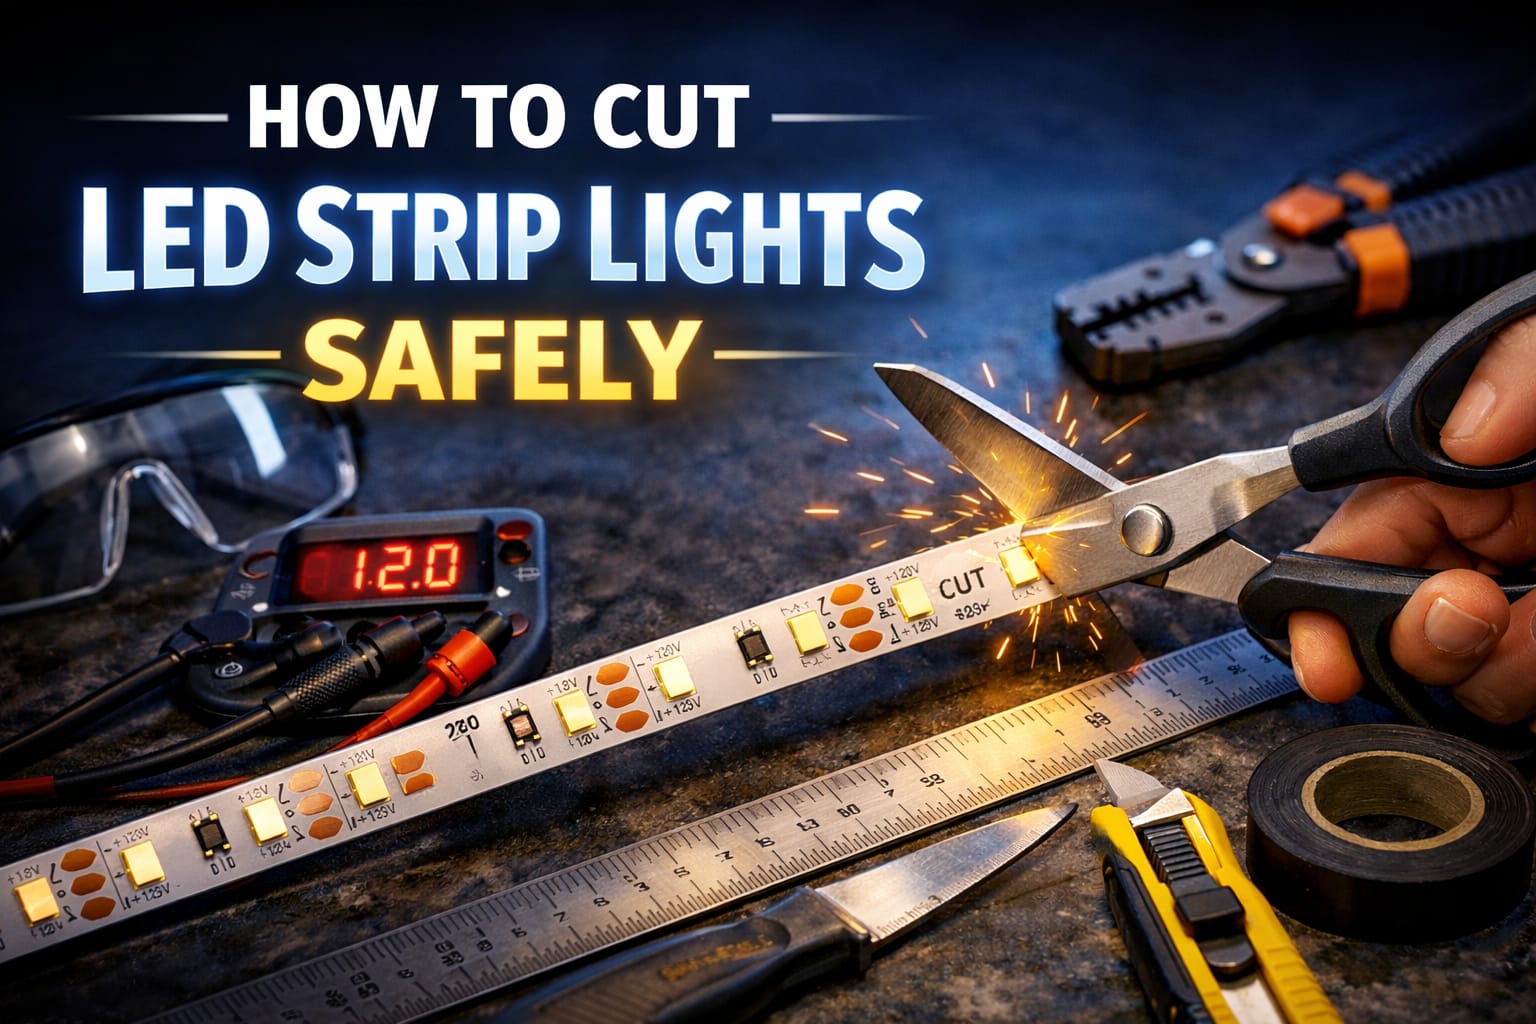
Table of Contents
Where You Can Cut LED Strip Lights
The most important rule is simple: only cut LED strip lights at the printed cut marks. These usually appear as a black line, a small scissor icon, or a group of exposed copper pads between LED sections. That marked area is where the strip is designed to be safely interrupted without damaging the rest of the circuit.
Those cut points are not random. They are placed where each segment can still operate correctly after trimming, based on the strip’s voltage and internal layout. On many 12V strips, one cut section contains three LEDs, while 24V strips often use longer segments. The exact spacing depends on the product, but the principle never changes: if there is no printed cut mark, do not cut there.
It also helps to know what type of strip you are working with. Single-color strips usually have two pads, RGB strips normally have four, and RGBW strips have five. If you cut and reconnect them later, those pads must line up correctly. If you are working with addressable LED strips, always check the manufacturer’s cutting interval first because their segment layout can be different from standard strips.
Tools and Preparation
You do not need many tools to cut LED strip lights well, but using the right ones makes the job cleaner and reduces the chance of damaging the copper pads. Sharp scissors or small cutters are fine for most strips, while a precision flush cutter gives a cleaner edge if you want the best possible result. A ruler or measuring tape helps you confirm length before cutting, and a marker can help you identify the exact segment you plan to trim.
Before you cut anything, lay the strip in place and check the full run without peeling off the adhesive backing. This gives you a chance to confirm corners, power lead placement, and connector spacing. If your exact measurement falls between two cut marks, it is usually better to adjust the layout slightly than to force an unsafe cut just to match a measurement perfectly.
Leave a little slack when planning for corners, connectors, or power leads. A strip that is slightly long is far easier to manage than one that was cut too short.
If you want to reuse offcuts, keep connectors or basic soldering tools nearby. A small amount of preparation before cutting makes the whole installation easier, especially if you need to reconnect sections later or troubleshoot a problem after trimming.

How to Cut LED Strip Lights Step by Step
Start by measuring the run carefully and locating the nearest printed cut mark that works for your layout. Once you find it, place the strip on a flat surface and position your scissors or cutters directly over the line. Make one straight cut across the entire width of the strip. Do not cut at an angle, do not nibble through the strip in several small snips, and do not cut between marked sections.
After cutting, inspect both ends closely. The copper pads should still be intact, flat, and easy to access. A clean edge matters because damaged pads can make future connectors unreliable and can complicate soldering if you decide to reconnect the strip later.
Before installing the strip permanently, connect it to a suitable power source and test it. The LEDs should light evenly without flickering, dark spots, or color problems. Testing now is much easier than discovering an issue after the strip has already been mounted and the adhesive is pressed into place.
If you plan to reconnect the strip later, label polarity immediately while the pads are easy to read. This is especially helpful when several cut sections are involved, because mixing up positive, negative, or channel labels is one of the easiest ways to create avoidable wiring problems.
Common Mistakes and Problems After Cutting
The most common mistake is cutting in the wrong place. Even a strip that looks simple can be damaged if you cut through an LED, resistor, or trace instead of directly on the marked line. Good lighting and a careful second look before cutting are often enough to prevent this. For a wider view of installation issues that affect strip projects, our guide to common LED wiring mistakes is also worth reading.
Another frequent problem is using dull tools. When the blade tears instead of slicing cleanly, the copper pads can lift or become uneven. That may not stop the strip immediately, but it often creates weak connections later. If only part of a segment lights up after cutting, inspect the edge closely because a damaged pad or trace near the cut point is often the cause.
If the whole cut section stays dark, first confirm that the power supply is correct and that polarity has not been reversed. A multimeter can help you check whether voltage is reaching the pads. If flickering appears after reconnecting the strip, the issue is usually poor contact rather than the LED chips themselves. Cleaning the pads, reseating the connector, or improving the solder joint often solves it.
If the strip becomes dim toward the far end, the actual issue may be voltage drop rather than the cut point. This is more common with longer runs, thin wire, or higher-output strips. In that situation, better wire sizing, shorter jumper leads, or power injection may be needed. A heat-shrink tubing kit can also help protect exposed joins and make them more stable over time. For larger installations, guidance from the Department of Energy is useful when planning reliable LED layouts.
Waterproof Strips and Reconnecting Cut Sections
Cutting waterproof LED strips needs extra care because the board is protected by silicone or another coating. Once you expose the cut end, the strip is no longer properly sealed. Before trimming, carefully reveal the marked cut point so you can see the line clearly and avoid damaging the board underneath.
A waterproof strip stops being waterproof as soon as the cut end is exposed. Do not use it in damp or outdoor conditions until the end has been properly resealed.
After cutting, reseal the end with silicone sealant or a compatible waterproof end cap. Let the sealant cure fully before powering the strip or exposing it to moisture. Even if the strip itself has an IP65, IP67, or IP68 rating, the finished installation is only as reliable as its exposed ends and connections.
If you want to reuse the cut section, you can reconnect it with clip-style connectors, soldered wire, or short jumper leads depending on how permanent the installation needs to be. Clip connectors are easiest for most users, while soldering usually provides the most reliable long-term result. If you want a full walkthrough, our guide on how to connect LED strip lights explains each method in more detail.
Key Takeaways
Cutting LED strip lights safely comes down to three basics: measure carefully, cut only at the printed mark, and test the strip before final installation. Those steps prevent most of the problems people run into.
Sharp tools, intact copper pads, and correct polarity matter even more if you plan to reconnect sections later. For waterproof strips, resealing the exposed end is essential if you want the installation to stay reliable.
Once you know where to cut and how to test the result, fitting LED strips to shelves, cabinets, desks, and accent lighting projects becomes much easier and far less wasteful.
Share this guide!
If this guide helped, save it for later or share it with someone planning a strip lighting project. It is especially useful for beginners, homeowners, and DIY installers.
Share using the links below.
Interested in learning more? Browse all related articles in our category section.