Addressable LED Strip Lights: RGBIC, Pixels & Power Guide
Addressable LED strip lights let you control individual pixels instead of making the whole strip show one color at a time. That is what makes RGBIC effects, moving gradients, chase patterns, music-reactive lighting, and custom scenes possible. This guide explains how addressable strips work, how they differ from regular RGB strips, and what to check before choosing a strip, controller, or power supply.
Quick Answer
Addressable LED strip lights use individually controlled pixels to create animations, gradients, and custom lighting effects that standard RGB strips cannot produce. For most DIY rooms, gaming setups, shelves, and accent lighting projects, a beginner-friendly addressable RGB LED strip is the easiest starting point, as long as you match it with the right controller and power supply.
- Choose addressable strips for animated effects, pixel control, and RGBIC-style lighting.
- Check voltage, pixel density, chip type, and controller compatibility before buying.
- Plan power carefully, especially on long runs or high-brightness installations.
- Use standard RGB strips only when you need simple single-color or whole-strip color changes.

Table of Contents:
- Quick Answer
- Understanding the Basics
- How Individual Control Works
- Key Components Explained
- Addressable LED Strip Lights vs. Traditional Strips
- Popular Chip Types and Buying Factors
- Programming Methods
- Creative Applications
- Power Requirements
- Choosing the Right Controller
- Installation Best Practices
- Key Takeaways
- Sharing This Guide
Understanding the Basics
Addressable LED strip lights work because each LED, or small group of LEDs, can receive its own control signal along the strip. Rather than forcing every diode to display the same color and brightness simultaneously, addressable technology enables each pixel to act independently. This opens the door to patterns, chases, gradients, and other dynamic effects.
Each segment includes a tiny integrated circuit that receives digital signals from the controller. These chips interpret the incoming data that defines the color and brightness of a specific pixel. The digital communication protocol keeps the strip synchronized across many individually controlled LEDs, provided the signal and power setup are correct.
Are you new to strip lighting? Our beginner’s guide is a good place to start before moving on to addressable setups. Understanding the core technology of different LED strip options makes it easier to choose the right strip for your space, budget, and goals.
How Individual Control Works
Individual LEDs are controlled through a data stream sent from the controller. Each chip reads the instructions intended for its pixel, applies them, and passes the remaining data to the next chip in line.
This daisy-chain approach is what makes per-pixel effects possible without running a separate control wire to every LED. The controller sends one long stream of color information, and each chip strips off its own portion before forwarding the rest. Because every pixel processes the signal in sequence, the order of the LEDs on the strip matters when you create patterns, chases, or segmented scenes.
In practical terms, the first LED is closest to the controller and reacts to the first part of the signal, while the next LEDs respond to the remaining data in order. That is why effects appear to travel down the strip in a predictable direction. Once you understand this signal path, it becomes much easier to troubleshoot animation errors, reversed effects, or pixels that stop responding after a damaged section.
Data Transmission Process
This process happens very quickly, typically at 400 to 800 kilohertz. Each pixel receives 24 bits of information—eight each for red, green, and blue—so the strip can display different colors and effects with good precision.
Because the controller refreshes the strip repeatedly, animations can look smooth even when many LEDs are active at once. However, longer strips take more time to update because the controller must send data through every pixel in the chain. This does not matter much for simple room lighting, but it becomes more important in large installations, music-reactive effects, or projects that need fast visual response.
Signal quality is also important, especially on longer runs. Weak connections, poor soldering, or excessive strip length can cause flickering, incorrect colors, or unresponsive sections. Stable wiring and proper grounding help keep the signal reliable.
It also helps to keep the controller close to the strip input and to avoid loose connectors at the first data point. In some setups, a level shifter or a short data line is useful for improving reliability, especially when the controller output voltage and strip input voltage are not ideal together. Good signal handling is one of the main reasons a professional-looking installation feels stable instead of random and frustrating.
Key Components Explained
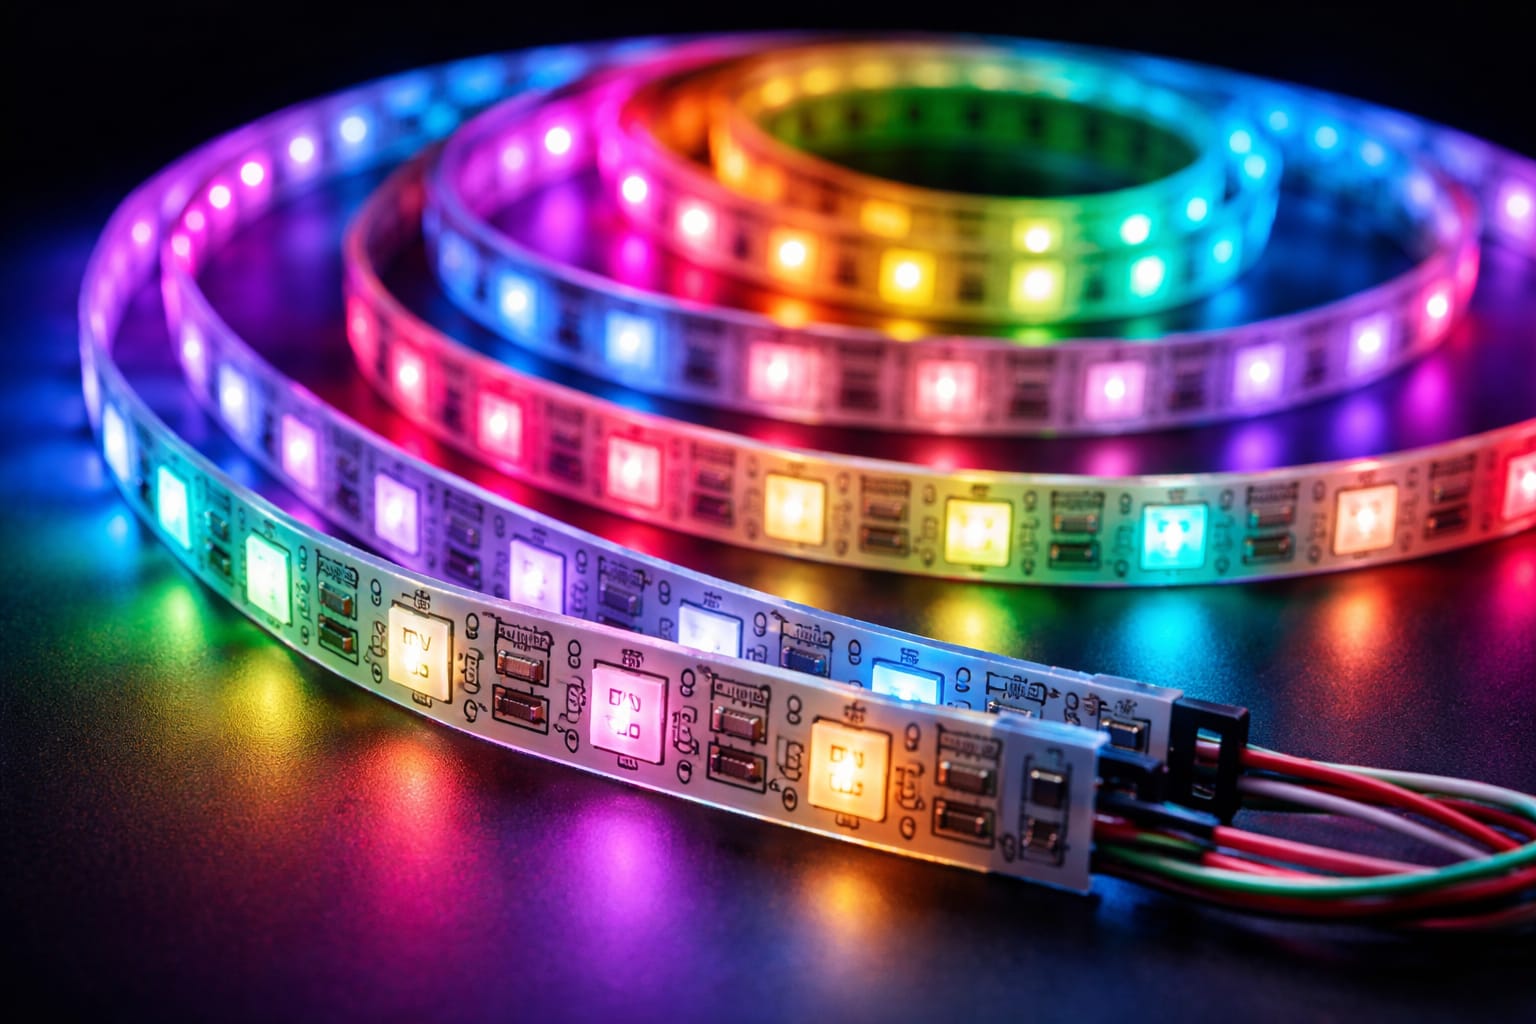
Every addressable LED strip light system includes several essential parts that work together. The most visible part is the flexible circuit board, which holds the LEDs, driver chips, and connection points in standard or weather-resistant form depending on where it will be used.
Each pixel location includes red, green, and blue LEDs alongside its control chip. Because these parts sit so close together, they often appear as a single light source. The integrated driver chip handles power distribution and color mixing for that pixel.
Circuit Board Construction
A flexible printed circuit board uses copper traces to carry power and data throughout an installation. Better-built strips often use multilayer construction techniques to separate power delivery from data transmission. This reduces interference and improves the reliability of RGB addressable strips.
Addressable LED Strip Lights vs. Traditional Strips
Traditional constant-voltage strips work very differently from addressable LED strip lights. Standard strips connect their diodes so that every section displays the same color and brightness simultaneously. With conventional analog strips, it is not possible to create per-pixel patterns, animations, or smooth gradients.
The practical difference is simple: choose a standard RGB strip when you only want the whole strip to change color together, and choose an addressable LED strip when you want movement, zones, gradients, or individual pixel effects. That makes addressable strips more useful for gaming rooms, TV backlighting, shelves, signs, displays, and creative DIY projects.
Cost is another major difference. Basic strips are usually cheaper for simple lighting jobs, but the creative potential of individually controlled LEDs can justify the extra cost when dynamic effects are desired.
According to the U.S. Department of Energy, LED lighting can improve energy efficiency. Programmable systems can also limit output to only the areas that need to be lit at a given moment.
Popular Chip Types and Buying Factors
Several types of chips are used in programmable LED lighting, and your choice affects compatibility, color quality, power planning, controller support, and overall performance.
This matters more than many beginners expect. Some chips are easier to find, some work better with certain controllers, and some are better suited to longer runs or cleaner white tones. Before buying a strip, it is worth checking the operating voltage, pixel density, color format, and controller support so you do not end up with hardware that is difficult to power or program correctly.
For many home setups, the best chip is not necessarily the most advanced one. The right choice depends on whether you care most about low cost, easy compatibility, smoother whites, longer cable runs, or more professional-looking effects. Understanding the common options helps you match the strip to the project instead of choosing based on popularity alone.
WS2812B: Best for Beginners and DIY Effects
The WS2812B is one of the most common options. It combines the control circuit and RGB LEDs in one compact package, uses a simple single-wire interface, and works well for most animations and DIY projects.
With a frequency of 800 kilohertz, the WS2812B supports smooth color transitions and refresh rates suitable for most effects. Each chip can draw approximately 60 milliamps at full white brightness, although actual power use depends on the selected color and intensity.
One reason the WS2812B is so widely used is ecosystem support. It works with many popular controllers, libraries, and presets, which makes tutorials and troubleshooting easier to find. That makes it a strong choice for beginners, hobby builds, gaming rooms, and decorative installs where 5V power and shorter runs are manageable.
Its main limitation is that 5V strips are more sensitive to voltage drop on long runs. As the strip gets longer, brightness and color balance can become less consistent without power injection. In other words, WS2812B is easy to start with, but careful power planning still matters once the installation grows beyond a small accent project.
SK6812: Better When You Want Cleaner White Light
SK6812 versions often offer better color accuracy and sometimes include a dedicated white LED for RGBW output. This can be especially useful in setups that need vibrant colors and cleaner white light.
That dedicated white channel can make a visible difference in practical use. Instead of mixing red, green, and blue to imitate white, an RGBW strip can produce whites that look more natural for ambient lighting, display shelves, or mixed-use rooms. This is helpful when the strip needs to switch between decorative color effects and everyday functional lighting.
It is also important to consider voltage and pixel density. 12V strips often perform better on longer runs, while higher density creates smoother effects but requires more power.
In general, higher-density strips are better for visible installations where you want smoother motion and fewer dark gaps between pixels. Lower-density strips can still work well for indirect lighting or budget builds, but they usually look less refined when the LEDs are directly visible. Matching chip type and density to the viewing distance is a simple way to get better results without overspending.
Programming Methods: Apps, Presets, and Microcontrollers
There are several methods for programming addressable LED strip lights, ranging from simple standalone controllers to advanced computer-based systems. Standalone controllers typically offer preset effects and basic customization, making them ideal for users who want immediate results without writing code.
Microcontroller platforms like Arduino and ESP8266 offer far greater flexibility for programmable LED lighting projects. While they require some coding knowledge, they also allow you to fine-tune the timing, effects, and interactive behavior based on sensors or network commands.
Professional installations often rely on dedicated software running on computers or specialized hardware. These setups can manage multiple zones, synchronize effects across larger spaces, and automate schedules for RGB addressable strips in commercial environments.
Creative Applications
Addressable LED strip lights are popular because they can produce effects that standard strips cannot. In homes, they are often used for accent lighting on shelves, in bedrooms, and in entertainment areas, where gradients and animated patterns can make a space feel more dynamic.
Their real advantage is flexibility. A single strip can act as subtle background lighting one moment and become a dynamic effect feature the next. Because the pixels can be programmed in groups or individually, the same installation can support mood lighting, seasonal themes, wake-up scenes, music-reactive effects, or attention-grabbing highlights around furniture and architectural details.
This makes addressable strips especially appealing for users who want more than simple decoration. They are often used where lighting needs to add atmosphere, guide attention, or respond to activity in the space. When planned well, the effects feel intentional and immersive rather than distracting, which is one of the biggest differences between a polished setup and a gimmicky one.
Home Entertainment Uses
They are also common behind TVs and in gaming setups because reactive lighting improves the atmosphere and makes the experience feel more immersive. If you want to transform your bedroom into a more dynamic space, our guide on the best LED strip lights for bedrooms provides more information on placement, color temperature, and smart control options.
This type of lighting can add visual impact without requiring major changes to the room, which is one reason it remains popular in modern entertainment spaces.
Beyond TVs and desks, addressable strips also work well under beds, behind headboards, around ceiling edges, or along shelves where indirect light softens the effect. In these locations, animated lighting can add depth without putting harsh points of light directly in view. That usually creates a cleaner result and helps the strip feel like part of the room design instead of a tech add-on.
They are also useful for scene-based lighting. For example, one preset might use warm low-brightness colors for winding down at night, while another uses brighter moving effects for gaming or parties. This ability to change the mood without changing the hardware is one of the strongest reasons people choose addressable strips over standard RGB strips.
Commercial Installations
In commercial spaces, these strips are used in retail displays, restaurants, and hospitality environments to create eye-catching effects and adapt lighting for different times, events, or promotions.
For a clearer picture of how these technologies differ, see our guide to RGB vs. RGBIC LED strip lights, which compares control methods, effects, and typical use cases.
Retail and hospitality businesses often use addressable strips to highlight product zones, guide customers through a space, or shift the mood throughout the day. A bar, for example, may use calmer tones early in the evening and more animated effects later on, while a store may use subtle motion to draw attention to a featured display without needing extra fixtures.
They are also valuable in event spaces, exhibits, and branded environments where lighting needs to feel custom. Because scenes can be reprogrammed, the same hardware can support different campaigns, seasons, or layouts over time. That makes addressable strips a versatile solution when visual impact matters but permanent architectural changes are not practical.
Power Requirements
Good power planning ensures that addressable LED strip lights run reliably over the long term. Each pixel draws power based on its color and brightness. The strip’s power usage peaks when displaying full white at maximum brightness; darker colors and lower brightness settings reduce the load.
Reducing brightness lowers heat and current draw, but the power supply still needs enough headroom for the strip’s maximum load.
To estimate power needs, multiply the number of pixels by the maximum current draw per pixel, which is often around 60 milliamps. Then, add at least 20 percent headroom to the power supply to ensure stable operation and longevity. Insufficient power can cause color shift, flicker, or weak output at the end of long runs. If your setup uses 12V components and the brightness is unstable, using a correctly sized 12V LED power supply may improve performance.
Longer installations often require power injection at multiple points along the strip. This compensates for voltage drop as electricity travels through the copper traces, helping to maintain consistent brightness and color accuracy.
Choosing the Right Controller
The controller you choose has a significant impact on the day-to-day performance of your programmable LED lighting system. Simple infrared remote controllers provide basic pattern selection and speed control, which is sufficient for straightforward setups where advanced customization is unnecessary. They offer plug-and-play convenience with minimal technical setup.
WiFi-enabled controllers work with smartphone applications and smart home platforms, making voice control and automation easier. They can support schedules, scenes, and remote access for RGB addressable strip setups. For app-based control, a Wi-Fi LED controller for addressable strips can simplify everyday operation without requiring custom coding.
Advanced users often prefer microcontroller-based solutions for custom programming and more flexible pattern creation. Platforms like Arduino, Raspberry Pi, and ESP32 boards offer extensive control but require more technical knowledge for proper setup.
Installation Best Practices
A successful installation of addressable LED strip lights starts with careful surface preparation. Clean, dry surfaces help create a strong adhesive bond and reduce the likelihood of premature failure. For permanent installations that require extra mechanical support and better heat dissipation, consider using additional mounting clips or aluminum channels.
Pay close attention to polarity when making connections. Reversed power wiring can immediately damage the integrated circuits in your individually controlled LEDs. Always verify the positive and negative terminals before applying power and use clearly labeled connectors to avoid mistakes during maintenance or upgrades.
Reversed polarity can destroy control chips instantly, so test the wiring before mounting the strip permanently.
Protect outdoor installations with the appropriate waterproof rating. IP65-rated strips can handle moisture and dust, while IP67 and IP68 ratings offer more protection for pools, fountains, and other wet environments. Ensure that your connectors and power supplies match the required protection level for your programmable LED lighting strips.
Test the full system before final installation. Running every pattern at maximum brightness can reveal power issues, bad connections, or defective sections while everything is still easily accessible. For broader guidance on LED terminology and product concepts, refer to our LED Knowledge Center throughout your project.
Key Takeaways
Addressable LED strip lights control each pixel independently, enabling animations, gradients, and custom effects that standard strips cannot produce. That individual control is based on a digital signal passing from one chip to the next, which is why signal direction and strip layout matter in real installations.
Chip choice affects more than compatibility. Popular options like WS2812B are easy to use and widely supported, while SK6812 versions can offer better white light and color flexibility. Voltage, pixel density, and controller support should all be checked before buying.
Creative applications range from TV backlighting and gaming rooms to retail displays and event spaces. The biggest benefit is versatility: the same strip can provide subtle ambient light, dynamic effects, or scene-based lighting depending on how it is programmed.
Reliable performance depends on more than the strip itself. A good controller, stable data signal, correct voltage, and proper power injection are all important for preventing flicker, color shift, and dim sections on longer runs.
Once you understand how control, chip selection, and power planning fit together, addressable strips become much easier to choose, install, and use well in both simple DIY projects and more advanced lighting setups.
Sharing This Guide
If you found this guide useful, save it for later or share it with a friend. It is especially helpful for beginners, homeowners, and DIY enthusiasts.
Share it using the links below:
Interested in learning more? Browse related articles in our category section.