Open Floor Plan Lighting Ideas for Kitchen, Dining & Living
Open floor plan lighting works best when the kitchen, dining area, and living zone all have a clear purpose without breaking the visual flow of the room. The goal is not to make one large space equally bright, but to use lighting to define zones, reduce glare, and make the whole layout feel balanced.
A strong plan usually combines recessed or ceiling lighting for general brightness, pendants or chandeliers to anchor key areas, task lighting where work happens, and dimmers so each zone can change from bright daytime use to softer evening light.
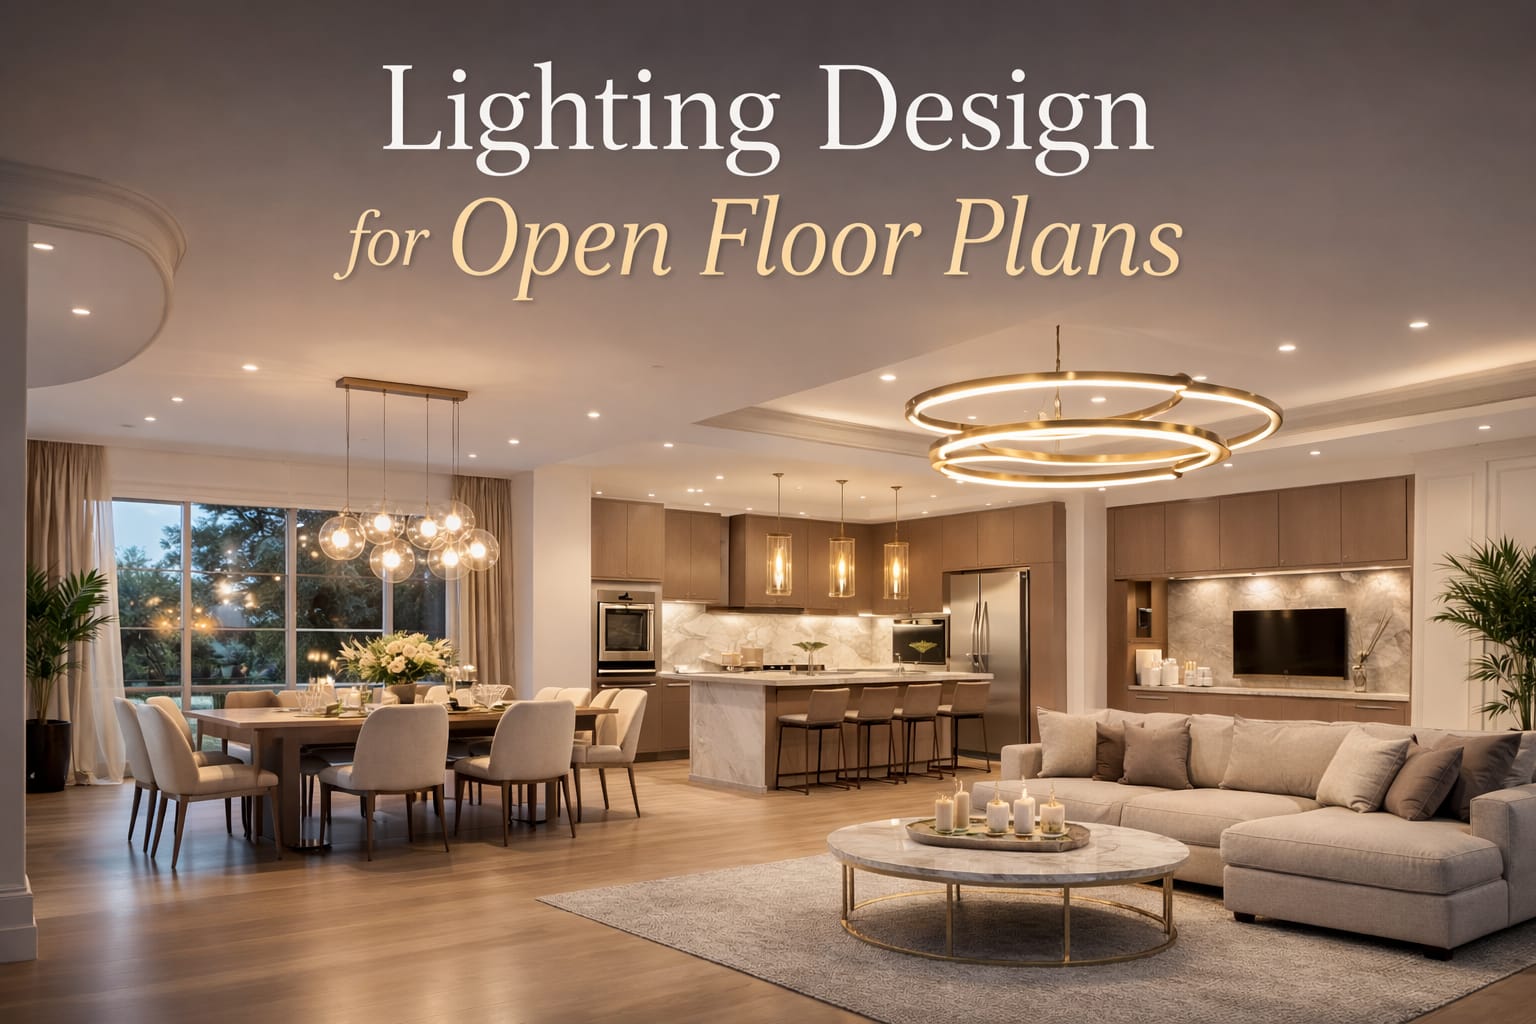
Quick answer: The best way to light an open floor plan is to divide it into zones: use stronger task lighting in the kitchen, a pendant or chandelier to anchor the dining area, softer layered lighting in the living zone, and separate dimmers so each area can change throughout the day.
Table of Contents:
Start With Lighting Zones
The biggest challenge in lighting design for open floor plans is giving each area a clear purpose without making the room feel chopped up. Light has to do some of the work that walls used to do, so the plan should begin with how the space is actually used: cooking, eating, relaxing, reading, working, entertaining, and moving through the room.
In practice, that usually means brighter light over the kitchen, a more focused fixture over the dining table, and softer layered light around the living area. Those differences help people understand the room instinctively. The space still feels open, but it no longer feels undefined.
This is where lighting layout planning becomes especially important. If you place fixtures as though the whole room serves one function, the result often feels flat and confusing. If you plan by zone first and connection second, the room usually feels far more intentional.
Best setup by zone:
Kitchen: recessed or ceiling lights for general brightness, under-cabinet or directional task lighting for prep work, and pendants over the island if the layout allows it.
Dining area: one chandelier or pendant group centered over the table, ideally on its own dimmer so the mood can change from everyday meals to evening use.
Living zone: softer ceiling light, lamps, accent lighting, and lower brightness levels so the space feels comfortable instead of washed out.
Desk or homework corner: dedicated task lighting instead of relying on spill light from the kitchen or ceiling cans.
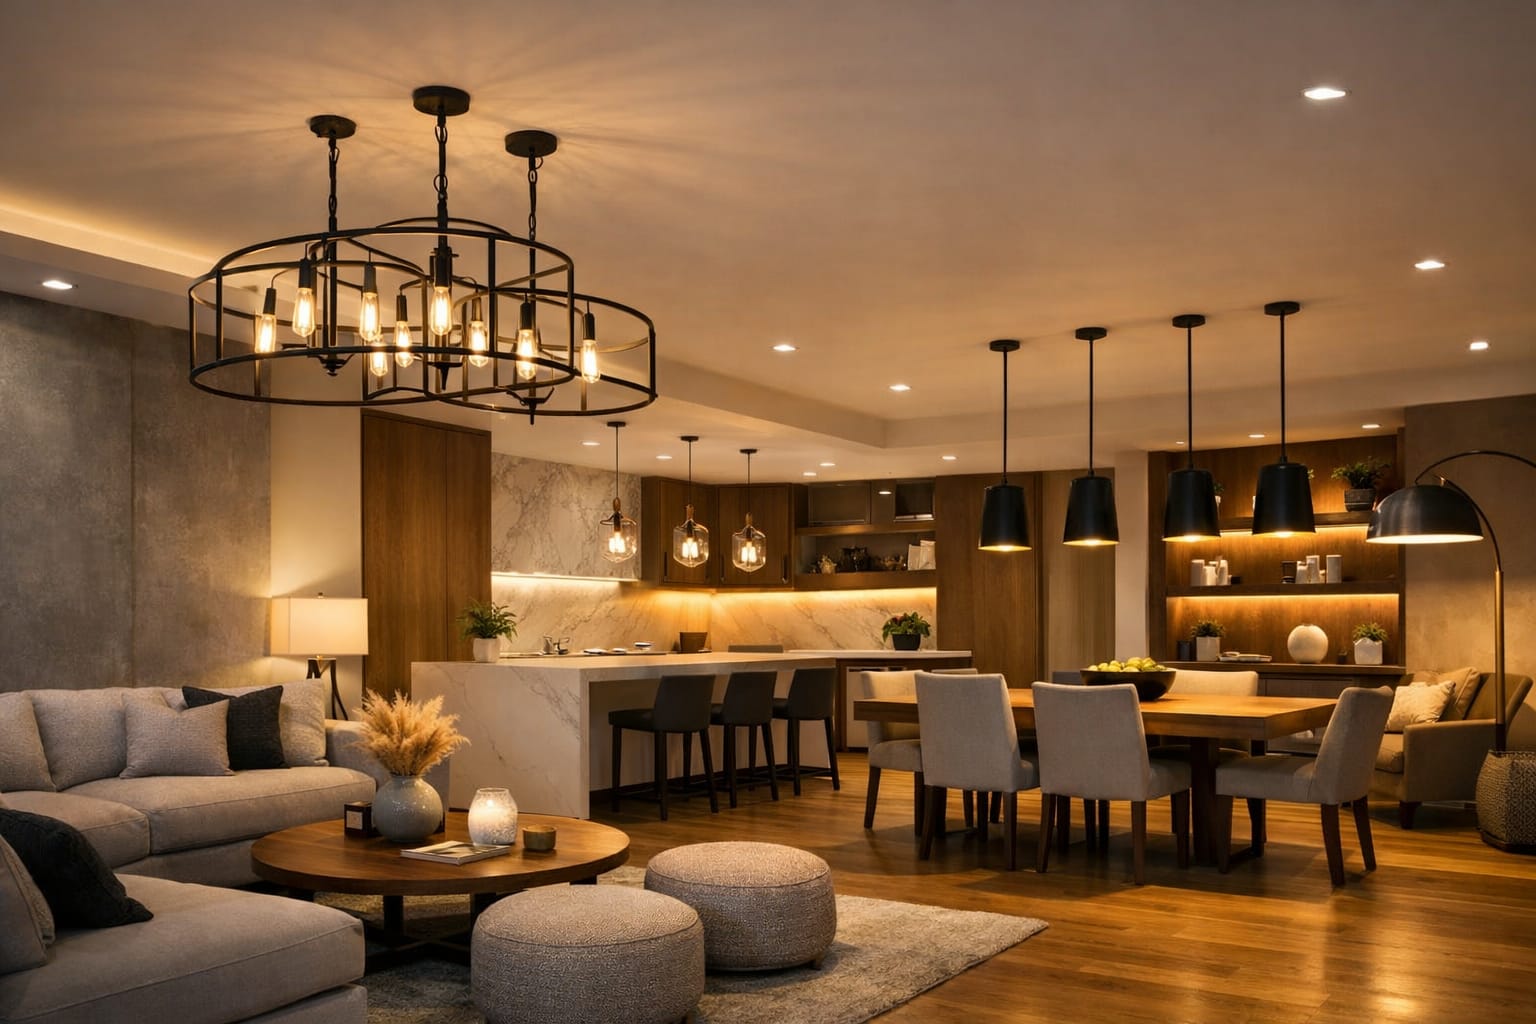
Choose the Right Fixtures for Each Zone
Because open layouts expose multiple fixtures at once, each light should have a job and still feel related to the rest of the room. That does not mean every fixture has to match exactly. It means the kitchen, dining and living areas should look like one planned system rather than three separate shopping trips.
Pendants and chandeliers are especially useful because they work as both light sources and visual anchors. Pendants above an island can define the kitchen zone and add task light. A chandelier or pendant over the dining table can create intimacy and make the eating area feel intentional even without walls around it.
For islands and counters, pendants are usually best hung around 30 to 36 inches above the surface. Dining tables often follow a similar range, though larger or more opaque shades may need small adjustments depending on glare and sight lines. The goal is to keep the fixture low enough to define the zone and high enough to avoid blocking views across the room.
Spacing matters too. Two pendants often suit shorter islands, while longer islands usually need three or more. The right spacing keeps the light balanced and avoids dark gaps or awkward crowding. If your layout still feels visually flat, a statement pendant light for a dining or island zone can help create a focal point without needing to add walls or partitions.
If you are unsure about the final hanging height, adjustable pendants are worth considering. Open floor plan rooms often reveal their best proportions only after furniture is in place. A little flexibility can save you from living with a fixture that feels slightly too low, too high, or too disconnected from the surface below it.
Use one main decorative fixture per zone. If the island pendants, dining chandelier and living room lamps all compete for attention, the open layout can feel busy instead of cohesive.
Build Ambient, Task and Accent Layers
Layered lighting is what keeps an open floor plan from looking flat. Ambient lighting gives the whole space usable brightness, task lighting supports specific activities, and accent lighting adds depth, rhythm and evening atmosphere. If one layer is missing, the room usually feels less comfortable than it should.
Ambient lighting is the foundation. In open layouts, recessed lighting is often the easiest way to spread light broadly without filling the ceiling with bulky fixtures. Done well, it keeps circulation areas bright enough and supports every zone without drawing too much attention to itself.
That said, recessed lights alone rarely produce the best result. A room with only ceiling cans often looks flat, especially in the evening. A stronger plan combines ambient lighting with task and accent layers so the room has depth instead of one uniform wash. This is exactly why our guide to ambient vs task vs accent lighting matters in open spaces.
Task lighting is where function becomes specific. In open floor plans, the kitchen usually needs the strongest task layer because cooking, prep, and cleanup demand clarity and contrast. Under-cabinet strips, island pendants, and sometimes directional ceiling lights handle that better than general ambient light alone.
Living areas are more variable. A reading corner may need a focused floor lamp, while a media zone may need very little task light at all. If the open layout includes a desk, homework counter, or hobby table, that area should get its own dedicated layer instead of borrowing weak spill light from nearby zones. If a work zone is part of the plan, our guide to lighting for home offices can help you avoid under-lighting that section just because it sits inside a larger open room.
Accent lighting should be used with restraint. Once ambient and task layers are working, accent fixtures can highlight shelving, artwork, textured walls, niches, or architectural details. A few strong focal points usually work better than trying to highlight every surface, especially because everything is visible at once in an open plan.
Portable lamps still matter too. Floor lamps and table lamps soften living zones and create a more residential feel than recessed lighting alone. They are especially helpful if the room layout may change later or if you want better layering without opening walls or rewiring ceilings.
Use Dimmers and Simple Controls
Dimming is one of the most useful upgrades you can add to an open floor plan. A bright kitchen-level setting may feel perfect in the morning, but the same output can feel harsh when people are eating, watching TV, or relaxing later in the day. Dimmers let the same room shift with the hour instead of staying locked in one mode.
Separate dimming zones for the kitchen, dining, and living areas make a huge difference. In many homes, that matters more than adding another decorative fixture. The best setup usually separates the main layers into usable zones, then gives you fast ways to call up common scenes.
For open layouts, an LED-compatible smart dimmer switch for separate lighting zones can be more useful than adding another decorative fixture, because it lets the kitchen, dining and living areas shift from bright daytime use to softer evening scenes. Just make sure your setup matches the switch requirements, especially neutral wire, single-pole wiring and 2.4 GHz Wi-Fi.
A bright cooking scene, a softer dinner scene, and a relaxed evening scene often cover most real-life use. Smart switches, dimmers, and voice control can help, but even well-planned manual controls go a long way. The important part is usability: if the controls are too complicated, people stop using the lighting the way it was designed.
If you want scene control without turning the whole project into an expensive smart home upgrade, this guide to smart lighting on a budget is a useful next step.
If you only make one control upgrade, make it separate dimmers for the main zones. That single change can make an open layout feel far more flexible without a major remodel.
Automation can also be useful in open rooms because one scene change can rebalance a large part of the home. Timed evening dimming, occupancy-based transitions in circulation areas, or simple voice scenes can make the layout feel more responsive and polished. For broader control, fixture, and planning topics, the LED Knowledge Center is a good next step.
Match Color Temperature and Fixture Finishes
Because open floor plans keep multiple areas in view at the same time, color temperature and fixture coordination matter more than they do in closed rooms. A warm living zone next to an overly cool kitchen can look disconnected even if the fixture styles match perfectly. Keeping the whole space within a sensible range usually creates a more polished result.
That does not mean every bulb must be identical. A subtle difference can work. For example, a kitchen may feel slightly better with a cleaner white light while the living area stays a little warmer. The trick is to keep the shift gentle enough that it feels intentional rather than mismatched.
High CRI matters here too. If one zone renders colors well and another does not, the inconsistency becomes visible across the room. Our article on lighting psychology and mood also connects closely to this, because color tone affects how inviting or energizing a shared space feels.
Fixture finishes should also feel connected. The easiest way to keep cohesion is to repeat something consistent across zones, such as finish, shape language, or material tone. You might combine matte black pendants in the kitchen with a matte black chandelier in the dining area and softer black-accent lamps in the living room. The fixtures do not need to be identical, but they should feel related.
A safe rule is to choose one dominant finish and, at most, one supporting finish. That keeps the room from feeling cluttered. It also helps to record your bulb specs when you first install them, because open rooms reveal mismatched replacements quickly.
Check Ceiling Height, Glare and Sight Lines
Ceiling height changes almost every decision in lighting design for open floor plans. Standard-height ceilings usually need a restrained mix of recessed lighting, flush or semi-flush fixtures, and carefully scaled pendants. Higher ceilings allow more dramatic pendants and chandeliers, but they also require stronger output and smarter spacing so the room does not feel underlit at floor level.
If the space includes vaulted sections, beam details, or split-height transitions, those features should influence both fixture type and placement. The room will feel much better if the lighting works with the ceiling geometry instead of ignoring it. That is why lighting for high ceilings often overlaps with open floor plan strategy.
Open floor plans also create long sight lines, and that changes how lighting feels. A pendant that looks beautiful from below may cause glare from the sofa. A polished floor can bounce too much light upward. A bright kitchen zone can dominate the room when someone is trying to relax nearby. These are not minor details; they shape whether the room feels comfortable every day.
This is why fixture height, bulb shielding, dimming and furniture orientation all matter together. If someone seated in the living room keeps seeing the brightest source in the space directly in their line of sight, the room will feel more tiring than it should. Our guide to common placement mistakes is especially relevant here, because open layouts make small positioning problems much more visible.
Do not judge glare only while standing. In open floor plan rooms, the most annoying problems often show up when you sit down and look across the space at night.
Glossy surfaces, polished floors, and large windows can also amplify brightness in ways that are easy to miss during planning. At night, windows often behave like mirrors, and strong interior lighting can create distracting reflections. Managing reflections is less about reducing light everywhere and more about directing it better.
Plan the Budget and Installation Phases
Open floor plans can get expensive quickly because one large space often needs several lighting roles at once. The smartest budget approach is usually to prioritize the zones that affect daily life the most. Kitchens and dining areas tend to offer the biggest payoff first because poor lighting there is noticed immediately.
It also helps to think in phases. Get the ambient and task layers right first, then add accent and decorative upgrades later if needed. That approach usually produces a better result than spending heavily on one statement fixture while leaving the rest of the room under-planned.
A practical order is usually: fix the main ambient layer, add task lighting where work happens, install dimmers or separate controls, then upgrade decorative and accent lighting. That keeps the budget focused on comfort and usability before style-only upgrades.
Replacing visible fixtures and adding portable lamps can be realistic DIY upgrades. But once new wiring, new control locations, recessed lighting changes, or major zoning changes are involved, professional input becomes much more valuable. Open floor plan rooms are unforgiving when the electrical planning is off.
Want to keep building the bigger picture? The LED Knowledge Center brings together practical lighting guides, room-by-room planning advice, and technical explanations that help you connect fixture choices with real-life use.
FAQs
What Is the Best Lighting for an Open Floor Plan?
The best lighting for an open floor plan is layered lighting: recessed or ceiling lights for general brightness, pendants or chandeliers for visual anchors, task lighting for work areas, and dimmers so each zone can be adjusted separately.
Should All Lights Match in an Open Concept Space?
They do not need to match exactly, but they should feel coordinated. Repeating one finish, material, shape, or color temperature across the kitchen, dining and living areas usually creates a more cohesive look than mixing unrelated fixtures.
How Do You Make an Open Floor Plan Feel Cozy With Lighting?
Use lower evening layers. Dim the kitchen lighting, rely more on lamps, accent lighting and the dining fixture, and avoid making the whole room equally bright at night. Cozy open plan lighting usually comes from contrast and control, not from more fixtures.
Are Recessed Lights Enough for an Open Floor Plan?
Recessed lights can provide a good ambient foundation, but they are rarely enough on their own. Without pendants, lamps, task lights or accent lighting, the room can look flat and feel less comfortable, especially in the evening.
Key Takeaways
Good open floor plan lighting starts with zones. Treat the kitchen, dining area and living space as connected but separate lighting needs, not as one oversized room that should be evenly bright everywhere.
The strongest plans combine ambient, task and accent lighting, then use pendants, chandeliers, lamps and dimmers to make each area feel purposeful. Dimming and control often matter as much as the fixtures themselves.
If you want the room to feel balanced, focus first on zoning, fixture coordination, glare control, color consistency and simple everyday usability. Decorative upgrades work best after those basics are already in place.
Sharing This Guide
If you found this guide helpful, you can save it for later or share it with a friend. It is especially useful for homeowners planning a new layout, a renovation, or a full lighting refresh.
Share using the links below
Interested in learning more? Browse related articles in our Lighting Guides category.